

Travel Blog is a distinctive free online travel journal for travellers throughout the world. It functions from internet cafes and computers world wide, allowing folks to upgrade an internet travel journal, it’s totally free to join and takes only minutes to set up, all you will need is a functioning email address.
You may contact us if you have company or media queries – or use the Traveling Forum for travelblog consumer service, travel queries, or simply introducing yourself.
What is a blog?
A website is an internet based diary. A great deal of vacationers write a daily journal or intend to, so the concept here is that you are able to write off your journal on line.
What is Travel Blog?
Travel Blog is a selection of tools that travelers can write a diary, send the address family members and friends, set up automatic mailing lists so every time you add a new entry to your list your pals get an automated email.
In addition, the theme is traveling, the resources are intended to deal with you going around, flags and maps are connected from each journal.Photographs can be added into a site when you’ve got a digital camera.
We invite our associates to connect to useful sites about places, to assist future travelers.
Write reviews, journals, guides, add photographs.
Which plans does Travel Blog have?
Hand chosen services, posts on offering information to new travelers, travel charting channels, movie uploads – you name it you will find plans for this in the travel blog.
1 strategy that has been put into activity – giving a friendly place to talk about traveling, service for new customers and someplace to chat about nearly anything. This website is busy – here to remain and growing everyday.
How to Create a Travel Blog
Here’s how to start a travel blog:
Through this site, I’ve funded ten years of full-time travel and gained a book deal for my travel memoir, along with a big New York City agent. I’ve been featured in large newspapers, like the Wall Street Journal, the Independent, and the BBC.
And yet, before starting Never Ending Footsteps, I had zero writing experience, had no idea how to run a website, didn’t really know what a blog was, and had never heard of WordPress.
- Find the perfect name to suit your personality.
- Set up hosting for your blog.
- Install WordPress.
- Learn how your blog’s dashboard works.
- Download a kickass theme.
- Design your logo.
- Install these essential plugins.
- Start building your audience and making money!
Start Travel Blog Step by Step
- Select Your Domain Name
- Sign up for Hosting
- How To Install WordPress
- Setting up your website
- Install your Theme
- Create Your Primary pages
Step 1: Select Your Domain Name
The very first thing you have to do is select a domain name (exporting your site name). When choosing your domain name, there are not any hard and fast rules about what to select. There is no such thing as a”incorrect domain” however there are a couple of things you need to know to Assist You Select the best domainname:
- Create a title which may last — Should you select “JohnsAsiaAdeventure.com” and you then depart Asia, the domain name will not make sense . Ensure that you decide on a name which is not so concentrated that in the event that you opt to change gears or alter your attention, you are able to keep the exact same domain name.
- Select a name which explains what you do as far as you can — I had been a nomad therefore”Nomadic Matt” was the ideal choice for me. If you are into luxury, place words on your domain that communicate that. You need people to find the title and go”I get exactly what that site is all about.”
- Keep it brief — I am not fond of using jargon or slang on your domain name as I believe that makes things confusing for folks who do not understand it. The very last thing you need is some thing going”What exactly does this mean?” Or becoming confused. If a person must consider the significance, then you have already lost them. Therefore don’t attempt to be smart either!
- Do not date your site — Do not select something linked to your age . “Twenty-Something Traveling” becomes very irrelevant once you get old, which really happened to some blogger I understand. Decide on a title which may be used regardless of your age!
Step 2: Sign up for Hosting
When you have picked your domain , you will want to register it and purchase hosting (the tiny computer in the sky that is going to power your site and keep it on). There are a whole lot of fundamental hosting companies out there but both that I like the top are Hostgator and Bluehost (they’re also the greatest out there also ).
Though possessed by precisely the exact same parent company, I lean Bluehost since they have excellent support, are simpler to work with, and have repaired lots of their structural difficulties so sites remain more (nobody wants their site to return ).
Below is a Step-by-step walk-through of how to register your domain with Bluehost:
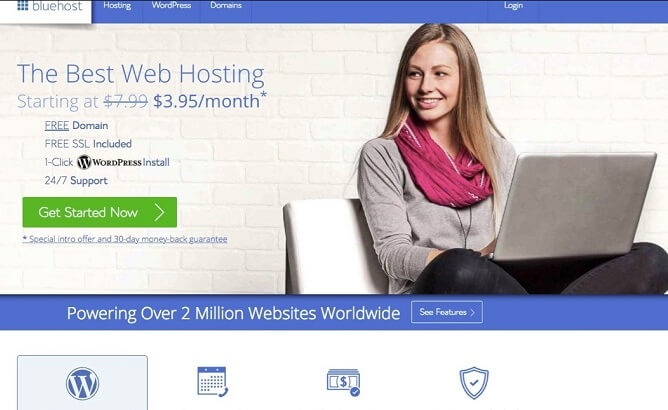
To begin with, just go over to Bluehost’s site and click on the green button that says”Get Started Now”
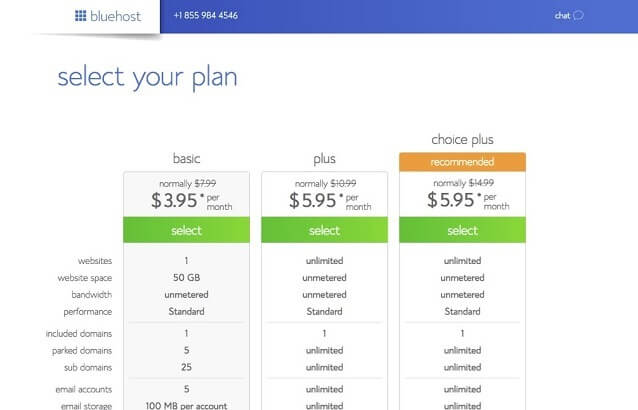
As you can see, the Choice Plus program offers the best value, but select whichever plan you believe is best for your circumstances. If you’re just blogging to get a enjoyable, the fundamental strategy will suffice. If you’re planning to get serious, I would propose the Choice Plus program as it will give you more space for your site, one of a handful of additional perks.
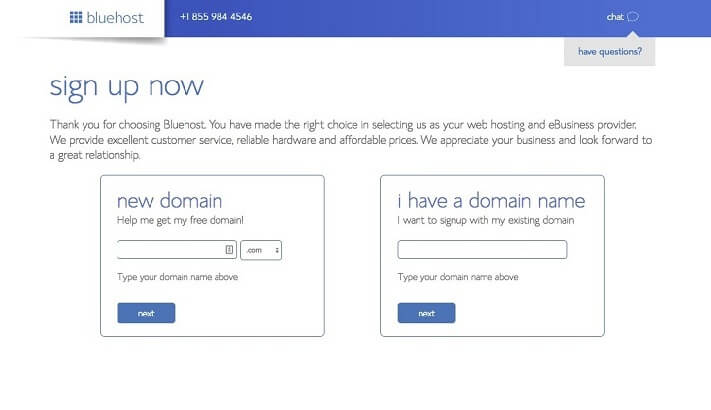
Next, you will only need to enter the site that you desire. If you already have bought the title from a third party supplier you are able to decide on the”I’ve a domain ” alternative. In case you haven’t bought your site name still, you will decide on the”New domain” alternative.
Now you’ll just need to fill out all your details. Input everything here and then scroll down the page.
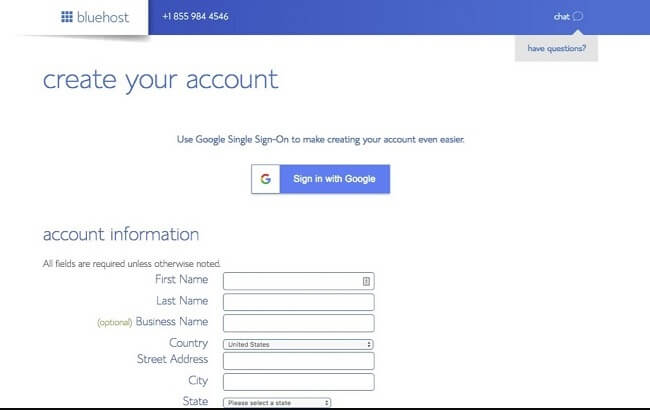
Here you’ll input your credit card details and choose whether or not you want any additional perks. I 100% recommend getting domain privacy. By law, website registry information is public. If you don’t opt for domain privacy, your information will be on public record – and you’ll probably get annoying calls from people trying to help you with your website. If you click domain privacy, Bluehost’s information is the public information not yours!
Step 3: How To Install WordPress
When you have registered your domain name and picked your own hosting package, the next thing you’re going to want to do is set up WordPress. (WordPress is exactly what will actually operate the site.
The server is just the computer your website stays on.) WordPress is an open-source and completely free Web publishing program, content management system (CMS) and blogging application assembled by a community of developers and contributors to ensure it is effortless for folks to blog!
When you have paid, you will find an email notification your login information. Once you follow on the link at the email and then log in, you will see this display.
From the dropdown menu, then pick your domain name and then hit”Next”:
Enter your personal info. Beneath the site name, enter the title of your site. Produce a username that is strong and then hit on install.
Then presto! It is completed!Following your WordPress is set up, a screen will display the username you selected along with a password created for you. Your site is up and running
Step 4: Setting up your website
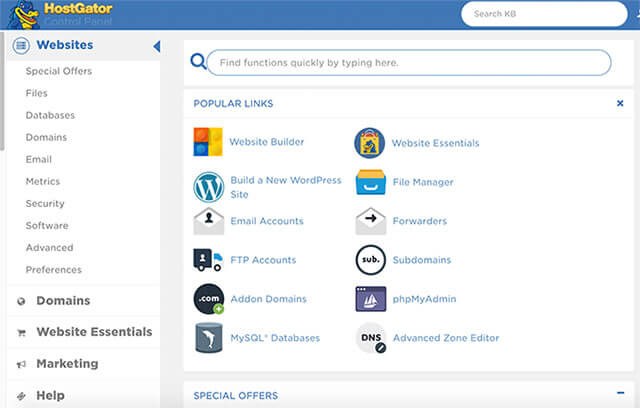
After you’ve installed WordPress, go to domainname.com/wp-admin and use the username and password you created to log in. You’ll see a screen like this after you log in:
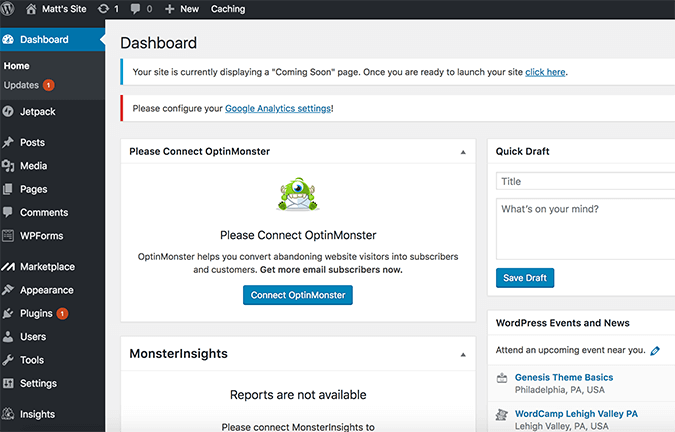
Here’s a brief overview of this menu on the left side of this display:
- Dashboard — The dash is the very first thing that you see when you log into WordPress, and it is the major administrative place for your own blog.
- Upgrades — This place will say whether WordPress, your own plugins, or your motif have to be upgraded.
- Jetpack — Jetpack is a plugin which lets you put in a spell-checker, contact types, additional widgets, etc.
- Posts — You are able to see all of your blog articles here, in addition to install new ones and include classes and tags.
- Media — Here is where you can see your networking library and include fresh media content, such as videos and photos.
- Pages — Pages will be the only real landing pages on your own site (such as your About page, Contact page, Resources webpage, etc.). It’s possible to add new pages as well as review and edit current ones.
- Comments — Comments in your site articles go here. You might choose to look at the spam folder periodically to be certain that you’re not overlooking actual remarks.
- Marketplace — here it is possible to make an internet market.
- Look — This section enables you to customize your website’s look.
- Plugins — Overview, install, and upgrade your plugins .
- Users — If there is more than 1 person accessing your site, you may create accounts and provide them certain statements.
- Tools — This segment contains specific tools to assist you with management jobs.
- Preferences — You can correct all of your website’s preferences , such as things like your site name and the size of thumbnails used.
- Insights — Insights supplies user and traffic stats about people visiting your site. (Google Analytics is a much better choice, however.)
Step 5: Install your Theme
Among the most significant things a website needs besides great content is a great layout. People today decide in moments whether they anticipate your site and decide to remain.
A visually unappealing site will turn off viewers and cut back the amount of return visits you receive. So to achieve a fantastic layout, you’ll require an wonderful WordPress motif (i.e., layout templates and documents ).
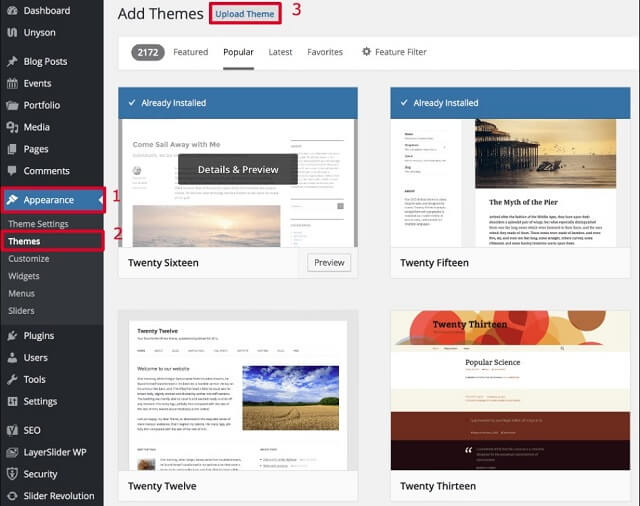
Fortunately, there are tons of out-of-the-box alternatives for you in which you may download a predesigned motif, upload it into your site, change it on, change a few settings, and presto! A brand new style for your site!
You can get:
- Free topics — Free topics are plentiful and also for budding new bloggers seeking to make their mark online. They appear to be a fantastic alternative, as they let you keep prices low. There are a number of great free themes on the internet, but the majority of them aren’t wonderful. It is possible to get some fantastic free topics at wordpress.org.
- Premium topics — The next step up from a free motif is a superior motif. Premium topics are compensated topics offering a little more uniqueness, flexibility, and performance.
Step 6: Create Your Primary pages
Once you’ve uploaded your topic, you are likely to want to produce a few fundamental pages on your site along with the blog posts. The distinction between a page and a post is that a page is a static piece of content that lives separate from the blog.
By way of instance, this post is a blog article. While I upgrade again, another blog article will get placed on top of it, and it will be pushed down in the archives, making it more challenging to find. But a page, such as my About page, resides on the cover of the website, directly near the main URL, and does NOT get buried. It’s a lot easier to find.
To create these pages, go again to your left sidebar and click Pages –> Insert New. (For blog posts, use Articles –> Add New.)
I recommend creating four fundamental pages to begin:
- About webpage – This where you tell people about your own background, what your site is all about, and it helps them. This is only one of the most important pages on your site, so make it personable!
- Contact page – Make sure you be quite clear on what emails you may and will not respond to, therefore individuals do not send you spam.
- Privacy page – This can be a typical user arrangement page telling readers exactly what the applicable legislation on your website are, which you use biscuits, etc. etc.. It is possible to discover out-of-the-box examples across the world wide web.
- Copyright page – This is a normal page allowing people know you have this job rather than to slip it. It is possible to discover out-of-the-box examples of them, also, throughout the world wide web.
(If you take a look in my footer, below the”About” section, it is possible to view examples of all four of those pages!)
Read Also: 10 Best places to Visit in Israel
Leave a Reply